
Home Improvement
How to Prepare for a Professional Garage Door Repair Appointment?
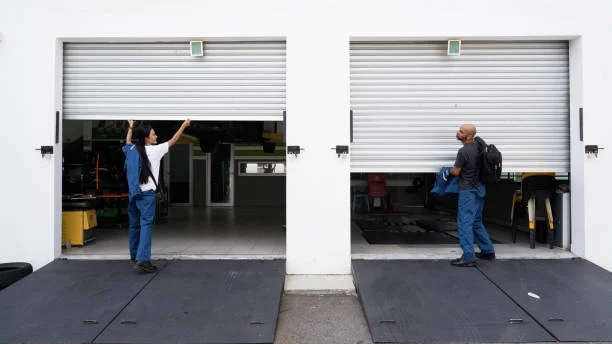
A garage door repair appointment may seem straightforward, but a little preparation can make a big difference in how efficiently the service is completed. Creating a safe and accessible workspace ensures the technician can identify and resolve the problem without unnecessary delays. Proper organization before the visit saves time, prevents hazards, and provides a smoother overall experience. Homeowners who prepare thoughtfully not only help speed up the process but also protect their property and maintain the safety of everyone involved. Preparation reflects readiness and respect for both the home and the technician performing the repair.
Dive deeper with articles closely related to what you’re reading right now.
Creating a Clear and Safe Work Environment
Before a technician arrives, ensure the garage area is clear of clutter, obstructions, and stored items that could block access to the door. Technicians need ample space to move around safely while inspecting tracks, springs, and cables. Clear away bicycles, boxes, and vehicles to give them room to work comfortably. Good lighting also plays a crucial role in enabling a precise visual assessment of mechanical parts. Keeping pets and children away from the work area reduces distractions and enhances safety. A clean, well-organized garage makes the process efficient while minimizing the risk of accidental damage to personal belongings. Taking these small steps before the repair appointment helps create a professional atmosphere that supports accurate diagnostics and effective repairs.
Gathering Information About the Problem
When preparing for a repair visit, it’s beneficial to gather as much information as possible about the garage door’s issue. Observe how the door behaves—whether it makes unusual noises, struggles to open evenly, or moves more slowly than usual. This information provides technicians with valuable clues to identify underlying problems more quickly. Write down any symptoms and note when they occur most frequently, such as during specific weather conditions or times of day. Providing these details can shorten diagnostic time and ensure the repair is addressed correctly. Working with a reliable repair company, such as https://everdoor.com/garage-door-repair-services-in-viera-fl/ one, one that values customer communication, makes this process even more effective, as technicians arrive equipped with the right tools and replacement parts based on your input. Clear communication between the homeowner and technician helps ensure the repair is completed efficiently and accurately, saving time and reducing stress.
Ensuring Access and Functionality
One of the most overlooked aspects of preparation is ensuring that the technician can easily access both the garage and any control mechanisms. If the garage door has an electronic opener, make sure it’s connected to power and functioning at least partially for testing purposes. Remove any obstructions near wall switches, circuit breakers, or fuse boxes that might interfere with the technician’s work. If you use security systems, turn off sensors or alarms temporarily to prevent interruptions during the repair. Also, verify that remote controls, keypads, and any manual locks are available and functioning, as they may need inspection. Making these elements accessible allows the technician to test the system comprehensively, from mechanical to electronic components. Small preparations like this can significantly reduce repair time and enable more accurate adjustments or replacements.
Securing Pets and Informing Family Members
Safety and efficiency go hand in hand during a garage door repair. Pets or small children wandering into the workspace can lead to distractions or injuries. Before the technician arrives, secure pets inside the house or in a fenced area and inform all family members about the repair schedule. This prevents unnecessary interruptions and ensures everyone’s safety. Maintaining a quiet environment helps technicians focus on assessing delicate parts such as tension springs and motor systems. Communication is key—ensure everyone at home understands which areas are off-limits during the appointment. Establishing a calm, controlled environment shows respect for the technician’s work while protecting household members from potential hazards. These thoughtful actions contribute to a seamless repair process and demonstrate responsible home management.
Preparing Documentation and Service History
Having relevant documents ready before the repair visit can make troubleshooting easier. If you have a record of past repairs, warranty information, or installation details, keep them accessible for reference. This information helps technicians understand the garage door’s history, allowing them to identify patterns or recurring issues. For example, knowing whether the springs or cables were recently replaced can guide them in determining which components might now need attention. Some homeowners also keep receipts or manuals for openers, which can be helpful if the technician needs to verify model numbers or manufacturer specifications. Organizing these materials before the appointment ensures the repair proceeds without unnecessary delays, demonstrating preparedness and commitment to maintaining the door’s long-term functionality.
Allowing Adequate Time for the Appointment
Garage door repairs vary in complexity—some may take only an hour, while others require more extensive work. Homeowners should plan their schedules with enough flexibility to accommodate the technician’s estimated repair time. Avoid back-to-back commitments that could rush the appointment or interrupt progress. When possible, remain available during the service to answer questions or approve adjustments. This presence allows for immediate clarification in the event of unexpected issues. Allowing the technician the necessary time to perform a thorough inspection ensures that every detail is addressed, thereby preventing future breakdowns. Being patient and present during the process helps guarantee that the repair is completed correctly the first time and that both parties leave satisfied with the outcome.
Checking Power and Lighting Conditions
Electrical power is essential for most garage door repairs, particularly when addressing issues with openers, sensors, or automated systems. Before the appointment, ensure that power outlets are functional and that the garage lighting is sufficient for clear visibility. Replace burned-out bulbs and test outlets to provide a steady current flow. If your garage is poorly lit, consider setting up portable lamps or opening the windows to let in natural light. Adequate lighting enables technicians to inspect intricate mechanisms safely and efficiently. It also helps them test electrical circuits, sensors, and wiring connections without interruption. Ensuring these conditions beforehand not only streamlines the repair process but also contributes to a safer, more productive work environment.
Making Space for Equipment and Tools
Technicians often bring equipment such as ladders, toolboxes, and replacement parts, all of which require working space. Clear the area around the garage entrance and driveway to allow the service vehicle to park nearby for easy unloading. Inside the garage, create an open area large enough for the technician to maneuver tools and test the door’s operation. Remove items stacked against walls or stored near the track system to eliminate obstructions. This preparation reduces downtime and ensures a smoother workflow. A well-organized space also lowers the risk of accidental damage to household items during repair activity. By making room for both equipment and movement, homeowners set the stage for an efficient, stress-free repair experience.
Reviewing the Repair Outcome and Next Steps
Once the repair is completed, take a few minutes to review the work with the technician. Ask questions about what was repaired, replaced, or adjusted. Understanding the job done provides valuable insight into how to maintain the garage door going forward. Technicians can often demonstrate how to lubricate moving parts or identify signs that indicate future maintenance is needed. Discuss any recommendations or warranties related to the repair so you know what to expect if issues arise later. This final review ensures transparency and confidence in the quality of the service provided. It also gives homeowners a sense of ownership and understanding of their garage door’s continued care.
Preparing for a professional garage door repair appointment ensures that the service is efficient, safe, and productive. By clearing space, securing access, organizing documentation, and maintaining communication, homeowners help technicians complete their work effectively. Taking proactive steps before the appointment not only saves time but also improves the overall quality of the repair. It reflects responsibility, organization, and a commitment to maintaining a secure and functional home. A well-prepared environment allows the technician to focus entirely on resolving the issue, ensuring the garage door operates smoothly and reliably for years to come.
Don’t miss out on our top picks — featured posts chosen just for you.
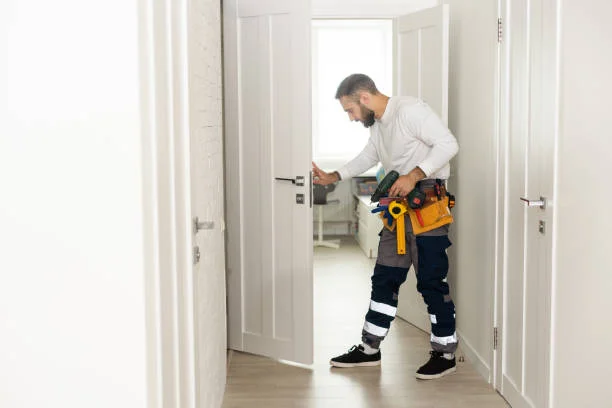
A newly installed door can instantly improve security, energy efficiency, and curb appeal, but the work does not end once the door is set into the frame. Many property owners assume that installation alone guarantees long-term performance, yet small maintenance and adjustment oversights can lead to drafts, sticking, water intrusion, or premature wear. Doors operate under constant use and are exposed to environmental changes such as humidity, temperature shifts, and structural movement. We will explore practical strategies to prevent common post-installation issues so that your investment continues to function smoothly and reliably. By understanding how door installation respond to everyday stressors, homeowners can take proactive steps that protect both performance and appearance for years to come.
Practical Steps to Maintain Door Performance After Installation
- Allow Proper Settling and Initial Inspection:
After a door is installed, it is essential to recognize that both the door and surrounding framing materials may need time to settle. Wood framing can expand or contract due to fluctuations in moisture, and even minor shifts can affect alignment. During the first few weeks, monitor how the door opens and closes. If you notice slight resistance, uneven gaps, or rubbing along the jamb, address these concerns promptly before they develop into larger structural problems. Tighten hinge screws if necessary and verify that the latch aligns cleanly with the strike plate. For additional guidance on exterior door performance and maintenance considerations, you can refer to https://harleyexteriors.com/. Ignoring early signs of misalignment can strain hardware and create long-term wear. By conducting an early inspection and making small adjustments, you reduce the risk of sticking, sagging, or compromised security later on.
- Maintain Proper Sealing and Weatherproofing:
One of the most common issues after installation is air or water infiltration around the door perimeter. Weatherstripping and threshold seals are designed to create a barrier against drafts and moisture, but they require periodic inspection. Check for gaps between the door slab and frame, particularly along the bottom edge, where water exposure is most likely to occur. Replace worn weatherstripping promptly to maintain energy efficiency and prevent interior damage. Additionally, confirm that exterior caulking remains intact and free from cracks. When sealants deteriorate, water can seep into framing components, leading to rot or mold growth. Maintaining a consistent seal not only improves indoor comfort but also protects the structural integrity of surrounding materials. Regular inspection ensures that small vulnerabilities do not escalate into costly repairs.
- Protect Against Moisture and Environmental Stress:
Doors, especially exterior models, are exposed to rain, sun, and fluctuating temperatures. Over time, moisture infiltration and ultraviolet exposure can cause warping, swelling, or surface degradation. To prevent these issues, ensure that protective finishes remain intact. Painted or stained doors should be inspected annually for peeling or fading. Reapply protective coatings as needed to maintain a resilient surface barrier. Proper drainage around entryways is equally important; confirm that gutters and downspouts direct water away from the door area. Standing water near the threshold can accelerate deterioration. By managing environmental stressors through surface maintenance and effective water control, you reduce the likelihood of material distortion and preserve long-term durability.
- Lubricate and Adjust Hardware Components:
Hinges, locks, and handles endure daily mechanical stress. Without routine lubrication, metal components can corrode or develop friction, which can affect smooth operation. Apply a suitable lubricant to hinges and locking mechanisms periodically to ensure quiet and consistent movement. In addition, verify that screws remain tight and that hardware sits flush against the door surface. Loose components can create wobbling or uneven weight distribution, leading to sagging. Over time, even minor hardware shifts can compromise door alignment. Conducting routine hardware checks extends the lifespan of moving parts and maintains security performance. A door that operates effortlessly reduces strain on both structural elements and users, preventing avoidable wear.
- Monitor Structural Movement of the Building:
Buildings naturally shift due to seasonal changes, soil movement, or settling foundations. These structural dynamics can influence door alignment long after installation. If you observe recurring sticking, widening gaps, or difficulty latching, the issue may stem from broader structural movement rather than the door itself. In such cases, inspect the frame for cracks or uneven spacing. Addressing foundational concerns early can prevent recurring alignment problems. While doors are designed to accommodate minor movement, significant shifts require corrective action to preserve functionality. Regularly assessing the surrounding structure ensures that alignment adjustments remain effective and that the door continues to perform as intended.
- Clean and Care for Surfaces Consistently:
Dirt accumulation may appear cosmetic, but it can contribute to operational issues over time. Dust and debris can settle into hinge joints, track systems, or locking mechanisms, interfering with smooth motion. Use mild cleaning solutions appropriate for the door material, whether wood, fiberglass, or steel. Avoid abrasive chemicals that may damage finishes or protective coatings. Keeping surfaces clean also allows you to spot early signs of damage, such as cracks, dents, or peeling paint. Consistent care not only preserves visual appeal but also supports mechanical reliability. A clean door environment reduces friction and promotes consistent performance throughout seasonal cycles.
- Schedule Periodic Professional Assessments:
Even with diligent homeowner maintenance, periodic professional inspections can provide additional assurance. Companies such as Harley Exteriors, known for exterior improvement services, emphasize the importance of evaluating door performance as part of broader home envelope maintenance. A trained technician can assess subtle alignment issues, insulation effectiveness, and hardware integrity that may not be immediately visible. Routine evaluations help identify potential weaknesses before they escalate into significant repairs.
Preventing common issues after door installation requires consistent attention rather than reactive repairs. While a properly installed door forms the foundation of long-term performance, ongoing care ensures that environmental exposure, mechanical wear, and structural movement do not compromise its function. By implementing these preventive strategies, homeowners protect energy efficiency, security, and aesthetic value. Thoughtful maintenance extends the service life of the door and reinforces the integrity of the surrounding structure, turning a single installation into a durable and dependable home improvement investment.

Hardwood flooring delivers warmth, durability, and long-term value, but its performance depends heavily on what lies beneath. A properly prepared subfloor determines whether the finished surface remains stable, quiet, and visually consistent over time. Even the highest-quality hardwood planks can fail prematurely if installed over an uneven, damp, or structurally weak base. Professional contractors understand that subfloor preparation is not a minor preliminary step but a technical process that directly influences moisture control, structural integrity, and dimensional stability. We will explore how hardwood flooring contractors methodically prepare subfloors to ensure lasting results and protect the investment homeowners make in their flooring systems.
Key Steps Contractors Follow to Ensure Subfloor Stability and Performance
- Comprehensive Inspection and Structural Assessment
Before any sanding, leveling, or installation begins, a hardwood flooring contractor conducts a thorough inspection of the subfloor system. This evaluation includes identifying the subfloor type—typically plywood, oriented strand board (OSB), or concrete—and assessing its structural integrity. They check for loose panels, protruding fasteners, signs of rot, delamination, or previous water damage. Floor joists are also evaluated for spacing and deflection, since excessive movement can cause hardwood planks to separate or squeak over time.
Contractors measure flatness using long straightedges or laser levels, documenting any deviations beyond manufacturer tolerances. This phase ensures the subfloor can support hardwood flooring without flexing or shifting. If structural deficiencies are found, repairs such as replacing damaged panels or reinforcing joists are completed before proceeding. Skipping this stage risks long-term movement issues that compromise the entire floor assembly.
- Moisture Testing and Environmental Control
Moisture management is one of the most critical components of subfloor preparation. Hardwood is a hygroscopic material, meaning it absorbs and releases moisture in response to environmental conditions. Contractors use moisture meters to test both the subfloor and the hardwood planks, ensuring compatibility within acceptable moisture content ranges. For concrete subfloors, calcium chloride tests or relative humidity probes may be used to determine vapor emission levels.
If moisture readings exceed recommended thresholds, mitigation strategies such as vapor barriers, sealers, or additional drying time are implemented. Contractors also verify indoor climate conditions, maintaining appropriate temperature and humidity levels before installation begins. By stabilizing the environment and confirming moisture balance, contractors reduce the risk of cupping, crowning, and dimensional distortion. This disciplined approach prevents long-term performance issues that often arise when moisture conditions are ignored.
- Surface Cleaning and Debris Removal
Once structural integrity and moisture conditions are verified, contractors focus on preparing a clean and contaminant-free surface. Dust, adhesive residue, oil stains, paint overspray, and construction debris can interfere with adhesive bonding or underlayment performance. For wooden subfloors, contractors vacuum thoroughly and may sand down high spots or remove residual materials left from previous flooring. Concrete slabs may require mechanical grinding to eliminate surface contaminants and improve adhesion.
Cleaning is not merely cosmetic; it ensures proper mechanical fastening and adhesive performance. Any small particles trapped beneath hardwood planks can create unevenness or noise under foot traffic. By ensuring a clean substrate, contractors establish a reliable interface between the subfloor and the finished hardwood surface, contributing to long-term stability and reduced maintenance concerns.
- Leveling and Flattening the Subfloor
Flatness is essential for hardwood longevity. Even minor deviations can create gaps, stress points, or hollow sounds after installation. Contractors measure the subfloor against manufacturer specifications, which often require variation limits within a few millimeters over a defined distance. High spots in wood subfloors are sanded down, while low areas are filled with approved patching compounds. For concrete slabs, self-leveling underlayment products may be applied to create a smooth, uniform surface.
This process ensures that hardwood planks sit evenly across the entire floor area, distributing weight consistently. Proper leveling reduces the likelihood of joint separation and surface irregularities. Contractors also confirm that expansion gaps will be maintained along walls and fixed structures to allow for natural wood movement. Attention to flatness at this stage directly influences the finished appearance and acoustic performance of the hardwood floor.
- Securing and Reinforcing the Subfloor
Movement beneath hardwood flooring is a primary cause of squeaks and instability. To prevent this, contractors secure loose panels with additional screws, ensuring firm attachment to floor joists. Fasteners are driven at appropriate intervals to eliminate shifting between panels and structural supports. When subfloor panels show signs of weakness, replacement sections are installed to restore integrity. Contractors may also add blocking between joists in areas prone to deflection, reinforcing the structure before hardwood installation begins. Addressing these concerns prior to installation minimizes post-installation callbacks and noise complaints. Reinforcement creates a solid base capable of supporting both foot traffic and furniture loads. By eliminating movement at the subfloor level, contractors protect the hardwood surface from stress that could otherwise lead to cracking, gapping, or premature wear.
Preparing a subfloor for hardwood flooring requires far more than a quick sweep before installation. It is a structured, multi-step process involving inspection, moisture evaluation, cleaning, leveling, reinforcement, and protective layering. Each phase contributes to the long-term success of the flooring system, ensuring that hardwood planks remain stable and visually consistent for years. When contractors follow these technical procedures carefully, they create a foundation capable of supporting the natural movement of wood while minimizing the risks of moisture and structural instability. Proper subfloor preparation ultimately determines whether hardwood flooring performs reliably or develops avoidable issues, making this foundational work essential for lasting results.

Outdoor living spaces have evolved from simple backyard areas into functional extensions of the home where families gather, entertain guests, and relax after long days. Homeowners are increasingly seeking durable, visually appealing surfaces that withstand changing weather conditions while maintaining structural integrity. Concrete patios have become a practical solution for achieving this balance between performance and design. We will explore how concrete patios contribute to long-term value, versatility, and comfort in outdoor environments. By understanding their structural advantages, aesthetic flexibility, and maintenance efficiency, property owners can make informed decisions about enhancing their exterior spaces with confidence.
Key Advantages of Concrete Patios in Modern Outdoor Design
- Structural Durability and Long-Term Performance
Concrete patios are widely recognized for their strength and resilience under varying environmental conditions. Unlike wood decking, which can warp, rot, or be damaged by insects, concrete maintains its structural integrity for decades when properly installed and cured. Its compressive strength allows it to handle heavy outdoor furniture, grills, fire pits, and even hot tubs without compromising the surface. In regions where seasonal temperature changes cause expansion and contraction, reinforced concrete with control joints helps prevent uncontrolled cracking.
Additionally, concrete resists moisture penetration more effectively than many alternative materials, reducing the risk of deterioration over time. This durability translates into fewer repairs and replacements, which directly supports long-term cost efficiency. When installed by a Professional Concrete Contractor, homeowners gain the added assurance that proper site preparation, reinforcement placement, and curing techniques are followed to maximize performance. When homeowners invest in a concrete patio, they select a material engineered to withstand both daily use and environmental stressors, making it a reliable foundation for outdoor living areas.
- Design Flexibility and Aesthetic Versatility
Modern concrete applications extend far beyond traditional gray slabs. Advances in finishing techniques allow homeowners to customize textures, patterns, and colors to complement architectural styles and landscaping themes. Stamped concrete can replicate the appearance of natural stone, brick, or tile at a fraction of the cost, while stained finishes introduce rich earth tones or contemporary shades that enhance visual appeal.
Exposed aggregate surfaces provide a textured look that blends seamlessly with garden settings, and polished finishes create a sleek, modern appearance for minimalist designs. These options allow property owners to align their patios with the home’s overall character without sacrificing durability. Concrete can also be shaped into curves or multi-level platforms, accommodating creative layouts that define seating areas, dining zones, and walkways. This adaptability ensures that outdoor spaces are not only functional but also visually cohesive and architecturally integrated.
- Low Maintenance Requirements and Cost Efficiency
One of the most practical benefits of concrete patios is their minimal maintenance requirements. Unlike wood surfaces that require periodic sealing, staining, or board replacement, concrete typically needs only occasional cleaning and resealing to maintain its appearance and protective barrier. Routine sweeping and washing with mild detergent are often sufficient to remove debris and surface stains. Properly sealed concrete resists oil spills, moisture absorption, and weather-related discoloration, helping preserve its finish over time.
The reduced need for ongoing upkeep lowers long-term maintenance expenses and saves homeowners significant time. In addition, the initial cost of concrete is generally competitive with other hardscaping materials, especially when longevity is factored in. Because the material does not deteriorate rapidly, replacement cycles are extended, resulting in favorable lifecycle economics. For households seeking a balance between affordability and endurance, concrete patios present a financially sound investment.
- Enhanced Outdoor Comfort and Functionality
Concrete patios enhance the usability of outdoor living spaces by providing a stable, even surface suitable for a wide range of activities. Whether hosting gatherings, setting up outdoor kitchens, or creating children’s play areas, a level concrete base enhances safety and accessibility. Textured finishes can increase slip resistance, particularly around pools or in regions with frequent rainfall. Additionally, concrete retains warmth from sunlight during cooler evenings, making the space more comfortable for extended use.
It can also be integrated with radiant heating systems in colder climates to reduce ice formation and expand seasonal usability. Drainage can be engineered directly into the slab design, preventing water pooling and minimizing erosion around the foundation. By offering a combination of stability, adaptability, and climate responsiveness, concrete patios transform underutilized backyards into functional environments that support year-round engagement.
- Environmental Considerations and Property Value Impact
Sustainability is an increasingly important factor in residential construction decisions. Concrete patios can contribute to environmentally responsible design when produced and installed thoughtfully. Many concrete mixes incorporate recycled materials, such as fly ash or slag, reducing demand for raw materials. Additionally, concrete’s long service life reduces replacement frequency, minimizing material waste over time. Light-colored finishes can reflect sunlight, reducing surface heat absorption and mitigating localized heat buildup.
From a real estate perspective, a well-designed patio enhances curb appeal and expands usable square footage, which may positively influence property valuation. Outdoor living spaces are often viewed as lifestyle assets, particularly in markets where entertaining and exterior relaxation are valued features. By combining durability, aesthetic appeal, and sustainability considerations, concrete patios serve both functional and economic objectives in residential properties.
Concrete patios offer a compelling combination of strength, adaptability, and economic practicality for homeowners seeking to enhance their outdoor living spaces. Their capacity to withstand environmental stress, support diverse design expressions, and require minimal maintenance makes them a durable foundation for exterior environments. Beyond structural benefits, concrete patios create cohesive spaces for social interaction, relaxation, and recreation while contributing to long-term property value. As outdoor areas continue to evolve into integrated living zones, material selection plays a critical role in performance and appearance. By evaluating durability, design flexibility, maintenance requirements, and environmental impact, homeowners can confidently choose concrete patios as a sustainable, enduring solution for modern outdoor lifestyles.

Budget Hacks CWBiancaMarket: Transform Your Shopping Routine Into Major Savings

How To Pick The Right Hybrid Gummies For You

www .defstartuporg: From Concept to Launch – Complete Roadmap for Startups

How to Prevent Common Issues After Door Installation

What Makes Sterile Gloves Different from Regular Gloves in Cleanrooms
-

 General6 months ago
Felixing: A Philosophy of Turning Simple Ideas into Wonders
-

 Health5 months ago
Lufanest: Effective Local Anesthesia with Fewer Risks
-

 General6 months ago
bardoek: The Artistic Heritage Inspiring Modern Creative Trends
-

 Entertainment5 months ago
هنتاوي.com: Your Gateway to Arabic Anime Content
-

 General5 months ago
Discover Anonib AZN: An Anonymous Asian Forum
-

 Fashion7 months ago
fashionisk .com – Your Ultimate Guide to Trendy, Smart Fashion
-

 Lifestyle7 months ago
Mariano Iduba: A Visionary Leader in Global Digital Growth
-

 Fashion7 months ago
Casîo: Explore Legacy, G-SHOCK Watches, Keyboards, and More