
Kitchen Remodeling
Best Kitchen Sinks: Materials, Styles, and Costs Compared (2026)
The best kitchen sinks last 20 to 30 years — so choosing the right material matters far more than picking a brand.
Consumer Reports testing confirms that material performance, not price, predicts long-term durability. A 16-gauge stainless sink at $200 routinely outperforms a poorly made composite at $400.
This guide covers every major material, mounting style, and budget tier. For related advice, see our Kitchen Repairs & Fixtures guide.
Quick Reference: Kitchen Sink Selector
| Field | Details |
| Fixture Type | Kitchen sink (undermount, drop-in, farmhouse, workstation) |
| Difficulty — Drop-In Swap | Beginner (1–2 hrs DIY) |
| Difficulty — Farmhouse Install | Advanced / Call a Pro |
| Tools Needed | Basin wrench, plumber’s putty, silicone caulk, adjustable wrench |
| Sink Cost (material only) | $150–$750 (kitchen) — HomeAdvisor, April 2025 |
| Installation Labor Cost | $230–$650 — Angi, April 2025 |
| Farmhouse Total Installed | $1,000–$4,000 — HomeAdvisor, April 2025 |
| Water Pressure Req. | Minimum 20–80 PSI per UPC |
| Drain Pipe Size (UPC) | Minimum 1.5 in; 2 in recommended |
| ⚠ Water Shutoff | Turn off supply valves under sink before any work |
| ⚠ Permit Required? | Replacing like-for-like: usually no. Adding new fixture or relocating: check local codes |
| When to Call a Pro | Farmhouse installation; any pipe relocation; water damage found |
Why Material Is the Most Important Decision
Consumer Reports found that sink prices have little correlation with performance. Material drives durability, noise, stain resistance, and long-term maintenance costs.
There are five main material categories worth knowing: stainless steel, composite granite, fireclay, cast iron, and copper.
Each suits a different kitchen type, budget, and maintenance preference. Matching material to your actual cooking habits prevents expensive regret.
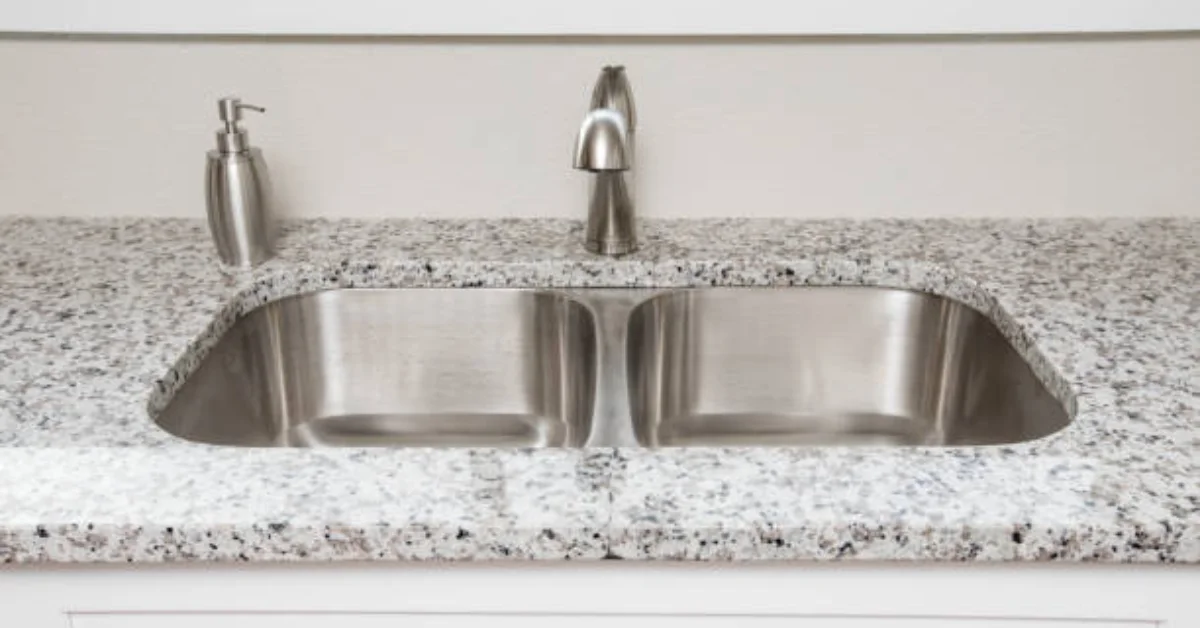
Stainless Steel Kitchen Sinks
Stainless steel holds the largest market share in the US. It is corrosion-resistant, nonporous, and resists bacterial growth — important for food prep surfaces.
Gauge thickness matters most. The lower the gauge number, the thicker and quieter the steel. An 18-gauge sink (0.048 in) is the minimum for a quality residential sink. A 16-gauge (0.060 in) sink resists denting better and costs $30–$80 more.
Sound-dampening pads underneath the basin reduce water noise by a measurable amount. Look for pads covering at least 60% of the sink base on any sink over $150.
Image source: https://media.istockphoto.com/id/940971956/photo/kitchen-sink-isolated-on-white-background.jpg?s=612×612&w=0&k=20&c=k5qqqiWfxFsYvgknuwl07-0o6H5aelIopABZP-XP4eU=
| ⚠ MATERIAL DAMAGE HAZARD — STAINLESS STEEL: Bleach and undiluted chlorine cleaners cause pitting and surface rust on stainless steel.Steel wool and abrasive scrubbers scratch the finish and trap moisture, promoting corrosion.Use mild dish soap and a soft cloth for daily cleaning. Bar Keepers Friend (non-scratch formula) is safe for periodic descaling.Source: Manufacturer SDS guidelines; Consumer Reports sink testing data. |
Composite Granite Kitchen Sinks
Composite granite sinks are made from 80% crushed granite stone bonded with resin. They resist scratches, heat up to approximately 535°F, and stains better than standard stainless steel.
The nonporous surface prevents bacterial harboring without special sealants. Darker colors (black, gray) show hard water deposits more visibly than lighter finishes.
Weight is 40–60 lbs for a standard basin. Confirm cabinet construction can support this load before ordering. Most standard base cabinets handle the weight without modification.
Image source: https://media.istockphoto.com/id/523786985/photo/stainless-steel-kitchen-sink-single-basin-composite-laminate-corian-grey-worktop-counter-top.jpg?s=612×612&w=0&k=20&c=wdwx09RwybrmlUAu3Q-UIrm6c_-1PpnD_U-8R8czPqc=
Fireclay Kitchen Sinks
Fireclay is kiln-fired clay glazed at temperatures exceeding 2,000°F. The result is an extremely dense, chip-resistant surface used primarily for farmhouse (apron-front) sinks.
Fireclay handles boiling water and thermal shock better than cast iron enamel. The glaze is non-porous and resists staining from acids, wine, and coffee without special sealants.
Most fireclay farmhouse sinks weigh 100–140 lbs. Professional installation is strongly recommended. Cabinet modification is almost always required.
Image source: https://media.istockphoto.com/id/91414065/photo/country-kitchen-sink.jpg?s=612×612&w=0&k=20&c=p3cXTUcEvX3KhHtsW9ndZj4h7lzGif_A4WlGmOCCThY=
| ⚠ WATER SHUTOFF — MANDATORY BEFORE ANY SINK WORK: Turn off both hot and cold supply valves located under the sink cabinet before disconnecting any drain or supply lines.If no local shutoff valves exist, turn off the main water supply to the house.Place a bucket under the P-trap before removing drain connections — residual water will spill.Source: Uniform Plumbing Code (UPC); This Old House plumbing guidelines. |
Cast Iron Kitchen Sinks
Cast iron sinks are heavy (100–200 lbs) and coated in fired enamel. The thick walls provide excellent sound dampening and heat retention.
Enamel chips under impact from heavy cast iron pans. Once the enamel is breached, the cast iron beneath corrodes rapidly. Avoid dropping heavy cookware into the basin.
Refinishing chipped enamel costs $300–$600 professionally, which can be cost-effective on a quality cast iron sink worth $500 or more.
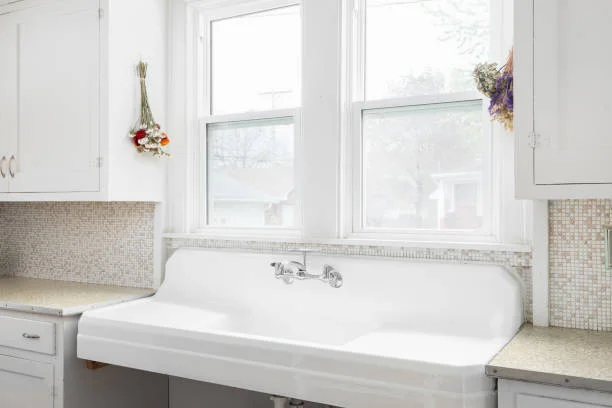
Image source: https://media.istockphoto.com/id/1508895831/photo/a-kitchen-farmhouse-detail-with-white-cabinets.jpg?s=612×612&w=0&k=20&c=bL4Zb-whUD5KXInaDeoAqsN3k3N0OkA7OK1LfWImYDk=
Copper Kitchen Sinks
Copper sinks are naturally antimicrobial and develop a living patina over time. Each sink is typically handcrafted, making every piece unique.
Acidic foods (citrus juice, tomato sauce, vinegar) accelerate patina development. This is not damage — it is expected with unlacquered copper.
Copper sink costs range from $450 to over $4,000, depending on gauge, craftsmanship, and finish. Annual wax sealing maintains the finish in high-use kitchens.
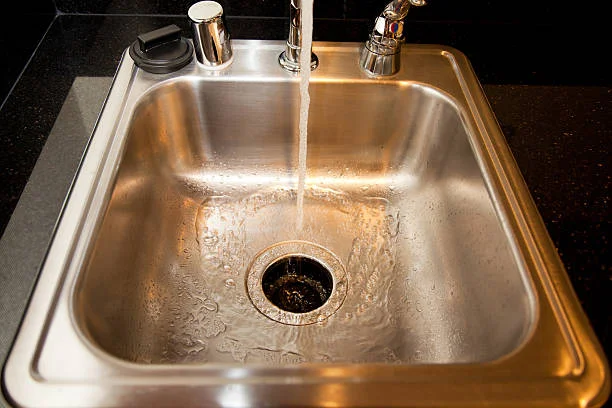
Image source: https://media.istockphoto.com/id/469892013/photo/water-down-the-drain.jpg?s=612×612&w=0&k=20&c=uHkva0JAVWFtGKHCm3z_OBPGzagZxutiqFgulze9IMU=
Mounting Types: Undermount vs Drop-In vs Farmhouse
The mounting type determines countertop compatibility, cleaning ease, and installation complexity.
Undermount sinks sit below the countertop surface. Crumbs and liquids wipe directly into the basin. Undermount installation requires stone or solid-surface countertops — it does not work on laminate.
Drop-in (top-mount) sinks rest in a cutout with a visible rim. They work with laminate, tile, or any countertop. Installation is the easiest of all styles, averaging 1–2 hours for a skilled DIYer.
Farmhouse (apron-front) sinks have an exposed front panel. They require custom cabinetry or cabinet modification. Professional installation is the standard recommendation.
Workstation sinks include integrated ledges for cutting boards, colanders, and drying racks. They suit home chefs needing multi-zone prep in a single basin. Most require undermount installation.
Standard Sink Dimensions and Cabinet Sizing
Most kitchen sinks fit 24- to 36-inch wide base cabinets. A 33-inch cabinet accepts most standard single-bowl and double-bowl sinks. Always measure the cabinet opening, not just the cabinet width.
Depth of 8–10 inches suits most households. Shallower basins (6–7 in) cause more water splash. Deeper basins (10–12 in) suit large cookware but increase back strain at lower counter heights.
Front-to-back depth is 22 inches for most standard sinks. Verify this matches your base cabinet before purchasing online.
Safety, Chemical & Material Hazards
| ⚠ CHEMICAL MIXING WARNING — KITCHEN CLEANING PRODUCTS: BLEACH + AMMONIA → chloramine gas (toxic). Never combine.BLEACH + VINEGAR → chlorine gas (toxic). Never combine.BLEACH + RUBBING ALCOHOL → chloroform compounds. Never combine.HYDROGEN PEROXIDE + VINEGAR → peracetic acid (irritant). Do not mix in same container.DRAIN CLEANER (acid) + ALKALI DRAIN CLEANER → violent reaction. Never combine in drain.Always work with adequate ventilation when using chemical cleaners. Wear gloves.Source: US EPA — Safer Choice program; manufacturer SDS sheets. |
| ⚠ PLUMBING SAFETY WARNING: Never modify gas supply lines. If your kitchen sink shares a wall with gas appliances, confirm no gas lines run through the cabinet before drilling or cutting.If you smell gas: leave immediately, do not operate any switches, and call your gas utility emergency line.Moving or extending drain lines may require a licensed plumber and plumbing permit depending on your jurisdiction.Source: CPSC; local Uniform Plumbing Code (UPC) requirements. |
| ⚠ MOULD & MOISTURE WARNING: Inspect under-sink cabinets for moisture and mould before installing a new sink.Black mould over 10 sq ft (approximately 0.9 m²) requires specialist mould remediation before work proceeds.Wear N95 respirator, gloves, and goggles when cleaning mould under sinks.Source: US EPA — Mold and Moisture guidance (epa.gov/mold). |
Pro Tips and Common Mistakes
| PRO TIP BOX: 1. Gauge confusion: Most sink listings say “16-gauge stainless” but sell 18-gauge. Check the product spec sheet for actual gauge before purchasing.2. Undermount failure: The most common $20 fix turned $800 problem is using the wrong adhesive for undermount installation. Use 100% silicone rated for kitchen/bath — not general construction adhesive.3. Sound pad coverage: A sink listing “sound dampening” may have only 20% pad coverage. Look for 60%+ coverage or a full undercoating for quiet operation.4. Cabinet weight check: Composite granite and fireclay sinks over 60 lbs need cabinet floor support assessment before installation. Add a support shelf if the cabinet floor flexes under hand pressure.5. Double-bowl drain alignment: When replacing a double-bowl sink, measure the existing drain centerline positions. Moving drain locations adds $100–$300 in labor. |
Common Problems and Solutions
| Problem | Symptoms / Signs | Likely Cause | DIY Fix | When to Call a Pro |
| Slow drain | Water pools for 30+ sec after rinsing | Grease buildup in P-trap or drain line | Remove and clean P-trap; use drain snake up to 25 ft | If clog is beyond the wall; recurring blockages suggest venting issue |
| Undermount separation | Gap appears between sink rim and countertop | Silicone caulk failure or adhesive failure | Clean, dry, and re-seal with 100% kitchen/bath silicone | If countertop is cracked or sink has shifted more than 1/4 in — structural re-bond needed |
| Stainless steel rust spots | Orange or brown spots on sink floor or sides | Bleach contact; steel wool scratches; standing water | Bar Keepers Friend (non-scratch); rinse thoroughly; dry after use | If pitting has penetrated the steel surface — sink may need replacement |
| Leaking at strainer | Water under cabinet; damp cabinet floor | Failed plumber’s putty or rubber gasket on strainer | Remove strainer, clean flange, apply fresh plumber’s putty, reinstall | If basket strainer body is cracked; if leak continues after resealing |
| Fireclay chipping | Small white chips in glaze near drain | Impact from heavy cast iron pan or dropped utensil | Touch-up with porcelain chip repair kit ($10–$20) | If chip exceeds 1/2 in diameter — professional resurfacing or replacement |
| Hard water deposits | White or gray film; rough texture | Mineral buildup from hard water (calcium/magnesium) | White vinegar soak 15–20 min (NOT on stone or copper). Rinse well. | Not needed — a cleaning issue, not a plumbing issue |
Budget and Cost Breakdown — Kitchen Sinks (2025)
| METHODOLOGY NOTEAll costs are estimates based on HomeAdvisor and Angi data, April 2025. Costs vary by region. Labor rates are higher in major metro areas. Always get 2–3 quotes from licensed plumbers. |
| Item | Budget ($150–$350) | Mid-Range ($350–$700) | Premium ($700–$2,000+) |
| Stainless steel sink | $150–$250 (18-gauge, single bowl) | $250–$450 (16-gauge, workstation) | $450–$800 (16-gauge, workstation + accessories) |
| Composite granite sink | $200–$350 | $350–$600 | $600–$1,200 |
| Fireclay farmhouse sink | Not available at budget tier | $600–$900 | $900–$2,500 |
| Cast iron sink | Not available at budget tier | $400–$700 (enamel) | $700–$1,500 |
| Copper sink | Not available at budget tier | Not available at mid tier | $450–$4,000+ |
| Drop-in installation labor | $230–$400 | $230–$400 | $300–$500 |
| Undermount installation labor | $300–$500 | $300–$500 | $350–$650 |
| Farmhouse installation labor | Not applicable | $400–$700 (cabinet mod req.) | $500–$900 |
| Faucet installation (add) | $90–$200 | $200–$400 | $400–$800+ |
| TOTAL (drop-in, installed) | $380–$650 | $550–$900 | $1,000–$2,500+ |
Sources: HomeAdvisor sink installation cost guide, April 2025; Angi sink cost data, April 2025. Regional note: Labor costs in New York, San Francisco, and Chicago typically run 20–35% above national average estimates shown here.
Material Comparison Table
| Material | Sink Cost | Durability | Maintenance | Best For | ⚠ Hazard / Note |
| Stainless Steel | $150–$800 | High — 20–30 yr lifespan if 16–18 gauge | Low — mild soap and cloth daily | Most kitchens; beginner-friendly | No bleach; no steel wool; dries to prevent water marks |
| Composite Granite | $200–$1,200 | Very high — scratch, heat (535°F), stain resistant | Low — wipe clean; no sealant needed | High-use kitchens; dark finishes suit modern style | Heavy (40–60 lbs) — confirm cabinet support before install |
| Fireclay | $600–$2,500 | Very high — dense kiln-fired glaze resists chipping | Low — no sealant; clean with mild soap | Farmhouse-style; heavy cookware households | Weight 100–140 lbs — professional install required |
| Cast Iron | $400–$1,500 | High — enamel coat lasts 15–25 yr with care | Medium — avoid impact; buff enamel regularly | Traditional kitchens; quiet operation priority | Heavy (100–200 lbs); enamel chips from heavy pan impact |
| Copper | $450–$4,000+ | High — develops patina; antimicrobial surface | Medium — annual wax; avoid acids | Custom or luxury kitchens; rustic/artisan style | Acidic foods accelerate patina; not for all users |
Frequently Asked Questions
What is the best material for a kitchen sink?
Consumer Reports testing finds that material performance predicts durability more reliably than brand or price. For most households, 16-gauge stainless steel or composite granite offers the best combination of durability, noise resistance, and low maintenance. Fireclay is ideal for farmhouse styles and heavy cookware use.
How much does it cost to install a kitchen sink?
Kitchen sink installation costs $380 to $1,400 on average, depending on sink type and plumbing work required, according to HomeAdvisor (April 2025). Drop-in sinks cost less to install ($230–$500 labor). Farmhouse sinks cost the most ($400–$900 labor) due to cabinet modification requirements. Adding a faucet installation adds $90–$400.
Do I need a permit to replace a kitchen sink?
A direct like-for-like sink replacement generally does not require a permit in most US jurisdictions (Fine Homebuilding, 2020). However, adding a new sink location, relocating drain or supply lines, or connecting to the municipal sewer requires a plumbing permit. California requires a plumbing permit for any sink installation. Always check with your local building department before starting work.
What gauge stainless steel is best for a kitchen sink?
16-gauge (0.060 in) is the industry recommendation for residential kitchen sinks. It resists denting from dropped pots and provides better sound dampening than 18-gauge (0.048 in). Avoid any sink thinner than 18-gauge for primary kitchen use. The lower the gauge number, the thicker and higher-quality the steel.
Can I clean a kitchen sink with bleach?
Bleach should not be used on stainless steel sinks — it causes surface pitting and rust. On white fireclay or porcelain sinks, diluted bleach (1 tablespoon per gallon of water) can remove stains but must be rinsed thoroughly. Never mix bleach with vinegar, ammonia, or rubbing alcohol — these combinations produce toxic gases. Source: US EPA Safer Choice guidance.
What size kitchen sink fits in a 33-inch cabinet?
A 33-inch base cabinet fits most standard single-bowl sinks (27–30 in wide) and double-bowl sinks (30–33 in wide). The sink must be at least 2–3 inches narrower than the cabinet opening to allow for mounting clips and cabinet frame. Measure the interior cabinet opening, not the exterior cabinet width, before purchasing.
Expert Authority Box
| KITCHEN AUTHORITY BOX: Standards sourced from: NKBA (National Kitchen and Bath Association), This Old House, and Family Handyman.Cost data: HomeAdvisor sink installation cost guide and Angi sink cost data — April 2025.Safety guidance: US EPA (epa.gov), CPSC (cpsc.gov), Uniform Plumbing Code (UPC).Plumbing code guidance: Fine Homebuilding — “When Do You Need a Permit?” (2020); California State Licensing Board (CSLB) plumbing code.Consumer testing reference: Consumer Reports sink materials testing methodology. |
Conclusion: Choosing the Best Kitchen Sinks
The best kitchen sinks match material to your actual cooking habits and budget. Stainless steel remains the most practical choice for most households.
For heavy cookware use and farmhouse aesthetics, fireclay delivers unmatched durability. Composite granite suits kitchens needing quiet operation and heat resistance without the weight of cast iron.
Budget at least $380–$650 total for a basic drop-in replacement installed by a professional. Farmhouse installations range $1,000–$4,000. Confirm local permit requirements before work begins.
Browse our Kitchen Remodeling category covering professional installation standards, 2026 cost milestones, and expert-verified renovation blueprints.
| DISCLAIMER: Advice in this article is based on published guidelines from industry authorities, manufacturer specifications, and Tier 1 sources as cited.Costs vary by region — all figures are estimates sourced from HomeAdvisor/Angi, April 2025, and should be verified locally before purchasing.Safety information is sourced from recognised authorities (EPA, CPSC, UPC) but does not constitute professional trade advice.For work involving gas supply lines, mains electrical circuits, or structural modifications, consult a licensed professional and check local building codes.This article is for informational purposes only. Always read product labels in full before use. |
Kitchen Floor Ideas That Actually Hold Up
Kitchen floor ideas are not short of options in 2025. The right choice, however, depends on three things: your budget, your moisture exposure, and how long you want it to last.
Luxury vinyl plank covers a 150 sq ft kitchen for as little as $675 installed. Porcelain tile can cost $7,500 for the same space — but it can outlast the house. This guide compares every realistic option with honest cost data and real safety notes.
Quick Reference: Kitchen Floor Ideas at a Glance
| Field | Details |
| Design Style | Multiple — see comparison table below |
| Ideal Kitchen Size | All sizes; layout choice affects perception of space |
| Budget Range | Budget $1–$5/sq ft material; Mid $5–$15; Premium $15–$50+ |
| Key Materials (2025) | LVP, Porcelain Tile, Engineered Wood, Laminate, Natural Stone |
| Current Trends (2025) | Matte finishes, herringbone, wide planks, large-format tile |
| Slip Resistance | Look for R10+ rating; matte/textured surfaces outperform gloss |
| Resale Value Impact | High — hardwood ~75% ROI (Angi, April 2026) |
| ⚠ VOC Safety | Look for FloorScore, GREENGUARD Gold, or CARB Phase 2 certification |
| Install: Call a Pro? | Yes for tile, stone, glue-down; DIY suitable for click-lock LVP/laminate |
Note: Costs are US estimates. They vary by region and material grade. Source: Angi / HomeAdvisor, April 2026.
How to Choose Between Kitchen Floor Ideas
Before picking a look, narrow down by function. Kitchens get spills, foot traffic, dropped pans, and chair legs. Not every flooring type handles all four equally well.
Ask yourself three questions. First: do you have pets or children? Second: is there any risk of flooding from a dishwasher or sink? Third: how long do you plan to stay in the home?
The answers point you toward the right category quickly. Long-term owner with kids and a leaky dishwasher? Porcelain tile or full-waterproof LVP. Short-term rental? Budget laminate or sheet vinyl.
The 8 Best Kitchen Floor Ideas in 2025
1. Luxury Vinyl Plank (LVP) — Most Versatile Pick
LVP is the most popular kitchen floor idea in 2025. It is fully waterproof, softer underfoot than tile, and comes in a wide range of wood and stone looks.
Material cost runs $3–$10 per sq ft. Installed, expect to pay $4.50–$15 per sq ft (Angi, April 2026). Click-lock planks suit confident DIYers.
However, lower-quality LVP dents under appliance legs and can fade in direct sunlight. Always check for FloorScore or GREENGUARD Gold certification before buying.
- 2025 trend: Wide, matte planks in warm oak and cool concrete tones flowing into adjacent living spaces (Americas Floor Source, 2025).
- Best for: Families, rentals, first-time renovators.
- Avoid: Budget-grade LVP under 6mm wear layer in commercial-grade traffic zones.
2. Porcelain Tile — Best for Durability
Porcelain tile is the most durable kitchen floor idea on this list. Properly installed, it lasts 50–60 years or more. It resists water, stains, and scratches equally well.
Total installed cost ranges from $9–$50 per sq ft. A standard 150 sq ft kitchen costs $1,350–$7,500 (Angi, April 2026). Always use a PEI wear rating of 3 or higher for floor use.
The downside is comfort: porcelain is cold and hard underfoot. Anti-fatigue mats near the hob and sink are a practical fix. Large-format tiles with minimal grout lines are the current trend.
- 2025 trend: Large-format matte porcelain (600mm x 600mm and above) with thin grout lines (FlooringInc, 2024).
- Best for: Busy households, pet owners, wet zones near sink and dishwasher.
- Avoid: Polished or high-gloss finishes — they become slippery when wet.
3. Ceramic Tile — Budget-Friendly Classic
Ceramic tile costs less than porcelain and is softer, making it easier to cut for DIY work. Material cost runs $1.50–$5 per sq ft; installed, expect $5–$20 per sq ft (HomeAdvisor, April 2026).
That said, ceramic is less dense and more porous than porcelain. It absorbs more water and can chip more easily under impact. Glaze the ceramic for kitchen use and reseal grout lines annually.
- Best for: Low-traffic kitchens, decorative patterns on a tighter budget.
- Avoid: Unglazed ceramic on kitchen floors — it stains easily.
4. Engineered Wood — Style With Practicality
Engineered hardwood gives the warmth and look of real wood with better moisture resistance. Its plywood core resists seasonal expansion better than solid wood.
Installed cost runs $6–$21 per sq ft (HomeAdvisor, April 2026). It can be refinished twice over its 20-year lifespan, extending value beyond the first installation.
Still, engineered wood is not waterproof. Persistent moisture under or around planks causes warping. Keep a mat near the sink and fix any leaking appliances before installation.
- 2025 trend: Lighter fruitwood and grey-brown tones replacing dark stains (Sebring Design, cited by FlooringInc, 2024).
- Best for: Style-focused kitchens, open-plan spaces where continuity with living areas matters.
5. Solid Hardwood — Timeless But High-Maintenance
Solid hardwood is one of the most appealing kitchen floor ideas for resale value. Angi reports hardwood delivers roughly 75% ROI on installation cost (Angi, April 2026).
Installed cost ranges $6–$25 per sq ft. Solid hardwood can be sanded and refinished 3–4 times over its lifetime — potentially lasting more than a century (Lowes, August 2025).
The risk is moisture. A leaking dishwasher or even daily mopping with excess water causes cupping and warping. Water-resistant polyurethane finishes reduce — but do not eliminate — that risk.
- Best for: Long-term homeowners in low-moisture kitchens who want maximum resale value.
- Avoid: Near sinks without rubber-backed mats; in kitchens with a history of flooding.
6. Laminate — Budget Style, Limited Longevity
Laminate flooring mimics real hardwood convincingly and costs $3–$13 per sq ft installed (HomeAdvisor, April 2026). It is easy to lay over existing hard floors — a genuine advantage in renovation work.
However, standard laminate is not waterproof. Standing water causes the fibreboard core to swell and separate. Waterproof laminate products improve this but do not match LVP or tile performance.
- Best for: Budget renovations, rental properties, spaces with low moisture risk.
- Avoid: Under any appliance that could leak; near a dishwasher without sealing the perimeter.
7. Natural Stone — Premium Look, High Commitment
Marble, slate, travertine, and limestone are dramatic kitchen floor ideas. Natural stone is unique per piece and creates a high-end finish no synthetic product fully replicates.
Expect to pay $15–$65+ per sq ft installed (Angi, April 2026) for natural stone tile. Maintenance is high: most stone must be sealed every 1–3 years. Unsealed stone stains rapidly from cooking oils and coffee.
- Best for: High-end renovations; homeowners committed to regular maintenance.
- Avoid: Polished marble on kitchen floors — it scratches and etches from acidic spills.
8. Sheet Vinyl — The Practical Budget Choice
Sheet vinyl is the most budget-friendly kitchen floor idea at $4–$12 per sq ft installed (HomeAdvisor, April 2026). Its seamless surface prevents water from getting underneath — a key advantage over plank or tile in spill-prone kitchens.
Professionally installed sheet vinyl is harder to DIY than click-lock products. Seams and edges need precise cutting to avoid lifting. It is not refinishable and typically replaced every 10–15 years.
- Best for: Rental units, budget kitchens, elderly households who want soft, easy-care flooring.
- Avoid: High-traffic areas with chair legs — sheet vinyl dents and tears with concentrated point pressure.
Safety, VOC & Material Hazard Warnings
| ⚠ VOC & INDOOR AIR QUALITY WARNING |
| Vinyl, laminate, and engineered wood flooring can off-gas volatile organic compounds (VOCs) — including formaldehyde — during and after installation. Indoor VOC levels can be 2–5 times higher than outdoors (EPA). |
| Always look for FloorScore (RFCI / SCS Global) or GREENGUARD Gold certification. Products compliant with CARB Phase 2 / ATCM 93120 meet the strictest formaldehyde emission limits. |
| During installation: ventilate the kitchen for at least 72 hours. Keep children and pets out of the room. Source: EPA Indoor Air Quality — https://www.epa.gov/indoor-air-quality-iaq |
| Off-gas risk: highest in the first 72 hours; may continue at lower levels for weeks with poor ventilation. |
| ⚠ NATURAL STONE CHEMICAL HAZARD |
| Never use vinegar, lemon juice, or acidic cleaners on marble, limestone, or travertine. Acidic solutions etch the surface permanently, removing the finish and exposing the stone to staining. |
| Bleach on natural stone causes surface pitting. Use only pH-neutral stone cleaners. |
| Use: Specially formulated stone cleaner. Avoid: vinegar, bleach, ammonia, abrasive powder. |
| ⚠ SLIP RESISTANCE NOTE |
| Polished tile, hardwood with high-gloss finish, and smooth sheet vinyl become hazardous when wet. This is a critical safety consideration in kitchens. |
| For tile, look for a PEI wear rating of 3–4 and a slip resistance R-value of R10 or above for residential kitchen floors. |
| Matte and textured finishes significantly reduce wet-slip risk. Anti-fatigue mats near sinks and stoves provide an additional safety layer. |
| ⚠ MOULD & MOISTURE WARNING |
| Grout lines, subfloor voids, and the edges of plank flooring near appliances are common sites for mould growth when moisture penetrates. |
| Black mould over 0.5 m² (5 sq ft) requires specialist removal. Do not attempt to clean extensive mould with bleach and a cloth — this disperses spores. Source: EPA Mould Guidelines. |
| Wear N95 mask, nitrile gloves, and eye protection when cleaning small areas of visible mould on grout or tile. |
Pro Tips & Common Mistakes
| PRO TIP BOX |
| 1. Buy 10–15% more flooring than your measured area. Cutting waste, pattern matching, and future repairs will need it — and you may not find the same batch later. |
| 2. Acclimate click-lock LVP and laminate for 48 hours in the room before installation. Temperature and humidity changes cause expansion; skipping this step leads to gaps or buckling. |
| 3. The most expensive mistake: installing tile over a subfloor with even slight flex. Tile grout cracks within months when the subfloor moves. Test first with a level and a flex test before tiling. |
| 4. For natural stone: seal before grouting, not just after. Grout stains unsealed stone and cannot be removed. |
| 5. Do not use steam mops on LVP, laminate, or engineered wood. Steam penetrates seams and causes delamination and swelling over time. Use a barely damp microfibre mop instead. |
| METHODOLOGY NOTE |
| Material comparisons in this article apply to standard residential kitchens in the US. Installation difficulty ratings assume a level, dry subfloor in good condition. |
| Cost estimates: Angi / HomeAdvisor, April 2026. Costs vary by region; US coastal cities average 10–20% higher than Midwest. Always obtain at least two local quotes. |
Common Kitchen Flooring Problems & Solutions
| Problem | Symptoms/Signs | Likely Cause | DIY Fix | When to Call a Pro |
| Cracked or chipped tile | Visible cracks or chips in one or more tiles | Dropped heavy object; subfloor flex | Replace individual tile with matching spare | Multiple tiles cracking = subfloor issue; call a pro |
| LVP plank lifting | Edges curling up; gaps between planks | Moisture under floor; improper acclimation | Re-press seams; check and fix moisture source | Widespread lifting = subfloor damage; call flooring pro |
| Grout discoloration | Dark, stained, or crumbling grout lines | Mould growth; failure to seal | Regrout or apply grout pen; reseal annually | Black mould over 5 sq ft requires specialist removal (EPA) |
| Wood floor warping | Cupped, buckled or wavy boards | Water intrusion from leaking pipe or appliance | Identify and fix leak immediately; dry area with fans | If boards are structurally damaged, call a flooring contractor |
| Slippery floor | Frequent slipping, especially when wet | Smooth/glossy finish + water | Add non-slip rugs; apply anti-slip coating | Permanent fix = replace with R10+ rated tile; consult pro |
| Squeaky laminate | Creaking or popping underfoot | Loose or uneven subfloor | Inject subfloor adhesive through plank gap | If subfloor is damaged or rotting, call a contractor |
Source: repair thresholds based on EPA mould guidance and manufacturer installation specifications.
Budget & Cost Breakdown: Kitchen Floor Ideas
| Material | Mat. Cost/sq ft | Labor/sq ft | Total/sq ft (Pro) | ⚠ Note |
| Sheet Vinyl | $1–$2 | $3–$10 | $4–$12 | Budget pick; avoid standing water |
| LVP / LVT | $3–$10 | $1.50–$5 | $4.50–$15 | Check for FloorScore cert |
| Laminate | $1–$6.50 | $1.50–$5 | $3–$13 | Not waterproof; no kitchens with flooding risk |
| Ceramic Tile | $1.50–$5 | $4–$15 | $5–$20 | Cold underfoot; seal grout annually |
| Porcelain Tile | $3–$15 | $4–$32 | $9–$50 | PEI rating 3+ for floors |
| Engineered Wood | $3–$13 | $3–$8 | $6–$21 | Keep moisture exposure minimal |
| Solid Hardwood | $6–$25 | $3–$8 | $6–$25+ | Avoid near sink; seal well |
| Natural Stone | $10–$50+ | $5–$15 | $15–$65+ | Must seal; cold and hard underfoot |
| TOTAL (avg 150 sq ft) | — | — | $675–$7,500+ | Source: Angi / HomeAdvisor, April 2026 |
| BUDGET CALLOUT |
| Budget tier ($1–$5/sq ft material): Sheet vinyl, basic ceramic tile, budget laminate. |
| Mid-range ($5–$15/sq ft installed): LVP, porcelain tile, engineered wood. |
| Premium ($15+/sq ft installed): Natural stone, solid hardwood, large-format porcelain. |
| Always add old flooring removal ($1.50–$7/sq ft) and subfloor repair ($3–$10/sq ft) to your budget if needed. |
| Regional note: US costs only. Coastal cities (NY, LA, SF) average 15–20% above the ranges shown. Source: Angi / HomeAdvisor, April 2026. |
Kitchen Flooring Material Comparison
| Material | Cost/sq ft (total) | Durability | Maintenance | Best For | ⚠ Hazard/Note |
| Porcelain Tile | $9–$50 | Excellent (50–60 yrs) | Low — damp mop only | Busy kitchens, pets | Cold underfoot; cracked tile = sharp edges; PEI 3+ required |
| LVP | $4.50–$15 | Good (15–25 yrs) | Very low | Families, rentals, DIY | Check FloorScore/GREENGUARD; PVC burns = toxic fumes |
| Engineered Wood | $6–$21 | Good (20 yrs) | Medium — reseal every 5–7 yrs | Style-focused kitchens | Keep dry; VOC off-gas risk if not CARB-compliant |
| Laminate | $3–$13 | Fair (10–20 yrs) | Low — no wet mopping | Budget renovations | Not waterproof; standing water causes swelling |
| Natural Stone | $15–$65+ | Excellent (lifetime) | High — seal annually | High-end, showpiece kitchens | Vinegar etches stone; marble highly porous; cold and slippery |
Source: cost data from Angi / HomeAdvisor (April 2026). Durability estimates based on manufacturer specifications and industry averages.
Frequently Asked Questions
What is the best kitchen floor idea for a busy household?
Porcelain tile and luxury vinyl plank lead for busy kitchens. Porcelain resists stains, water, and scratches for 50+ years. LVP is softer underfoot, quieter, and easier for DIY, with full waterproofing when seams are kept tight.
How much does kitchen flooring cost to install in 2025?
Costs range from $4–$50+ per sq ft installed, depending on material. Sheet vinyl starts at $4–$12/sq ft. Porcelain tile runs $9–$50/sq ft. Hardwood ranges $6–$25/sq ft. For a 150 sq ft kitchen, budget $600–$7,500+. Source: Angi / HomeAdvisor, April 2026.
Is kitchen flooring installation a DIY project?
Click-lock LVP and laminate are genuinely DIY-friendly. Tile, natural stone, and glue-down hardwood require professional installation for a flat, lasting result. A poorly levelled tile job can crack within months.
Are vinyl and laminate kitchen floors safe to breathe around?
During and after installation, some products off-gas VOCs, including formaldehyde. Choose FloorScore, GREENGUARD Gold, or CARB Phase 2 compliant products. Ventilate well during and after installation. Source: EPA Indoor Air Quality.
What kitchen flooring is easiest to clean?
Porcelain tile is the easiest: non-porous, stain-resistant, cleaned with a damp mop and mild detergent. LVP is a close second. Natural stone requires sealing and special pH-neutral cleaners — vinegar and lemon juice etch marble.
| KITCHEN AUTHORITY BOX |
| Material standards sourced from: Lowes Home Improvement editorial (August 2025); Americas Floor Source (2025); FlooringInc trend data (2024). |
| Cost data from: Angi / HomeAdvisor (April 2026). |
Browse our Kitchen Remodeling category covering professional installation standards, 2026 cost milestones, and expert-verified renovation blueprints.
| Disclaimer: Advice in this article is based on published guidelines from industry authorities, manufacturer specifications, and Tier 1 sources as cited. Costs vary by region — all figures are estimates sourced at the date stated and should be verified locally before purchasing. Safety information is sourced from recognised authorities but does not constitute professional trade advice. For work involving structural modifications, consult a licensed professional and check local building codes. This article is for informational purposes only. Always read product labels in full before use. |
A kitchen countertop getting too stained is a common problem — and most stains respond to targeted methods based on the surface type. The wrong cleaner can etch, dull, or permanently damage the surface. This guide covers what works, what to avoid, and how to stop stains before they set.
Quick Reference: Countertop Stain Removal at a Glance
| Field | Detail |
| Task | Remove stains from kitchen countertops |
| Category | Kitchen Cleaning & Maintenance |
| Difficulty | Beginner to Intermediate (depends on material) |
| Time Required | 5–30 mins per stain; poultice method: 24–48 hours |
| Frequency | Treat stains immediately; deep clean monthly |
| Products Needed | Dish soap, baking soda, hydrogen peroxide (3%), stone-safe cleaner |
| ⚠ Chemical Safety | Never mix bleach + vinegar or bleach + ammonia — toxic gas produced. Wear gloves. Ventilate. |
| Cost (DIY approx.) | $2–$20 for cleaning supplies (estimate, April 2026). Pro stone restoration: $200–$2,500 (Angi, 2026) |
Why Countertops Stain — and What That Means for Cleaning
Different countertop materials absorb and resist stains in different ways. Knowing your surface type is the first step toward fixing the problem without causing damage.
Porous surfaces like marble, granite, and butcher block allow liquids to penetrate if unsealed. Non-porous surfaces like quartz and laminate keep stains on the surface — making them easier to remove.
Acting fast matters on every material. According to This Old House, stains that penetrate porous stone quickly can require a 24–48 hour poultice treatment to draw them out.

Image Source: https://media.istockphoto.com/id/2195210196/photo/a-person-is-cleaning-a-countertop-with-a-yellow-sponge.jpg?s=612×612&w=0&k=20&c=WNGJ6WFfaEAA5vQXtTU_0xptQcYdNzf8x52R_L8wQLw=
Step-by-Step: Stain Removal by Countertop Material
Granite
First, wipe the area with warm water and mild dish soap using a soft cloth. For oil stains, apply a baking soda-and-water paste directly to the mark. Cover with plastic wrap. Leave for 24–48 hours. Then rinse with warm water and dry with a soft towel.
For wine or coffee, use a paste of baking soda and hydrogen peroxide (3%). Apply the same way. Avoid abrasive scrubbers — they strip the protective sealant.
Do not use bleach, vinegar, or ammonia on granite. These degrade the stone’s sealer and can leave a dull film, according to stone care specialists and manufacturer guidance.
Quartz
For grease stains, use equal parts dish soap and warm water with a sponge. For stubborn spots, Angi home expert Mallory Micetich recommends a baking soda-and-water paste. Spread on the stain, cover with plastic wrap, and leave for up to 24 hours.
Quartz is non-porous and does not need sealing. However, avoid harsh chemicals. Bleach and strong alkaline cleaners can dull the resin binders in engineered quartz over time.
Do not use acetone-based products. Acetone can melt the surface coating on quartz and laminate.
Marble
Marble is porous and etches easily. Blot spills — never wipe. Wiping spreads the liquid further into the stone.
For wine or coffee on marble, use a baking soda and hydrogen peroxide poultice. Cover with plastic wrap overnight. For acidic marks (citrus, vinegar), use a baking soda and water paste only. Avoid vinegar-based cleaners entirely on marble — they etch the surface permanently.
Marble should be resealed annually. A dull ring or discolouration that does not respond to cleaning is etching, not staining — it requires professional resurfacing.
Laminate
For most stains on laminate, a soft sponge with mild dish soap and water removes the mark. For stubborn stains, apply a paste of baking soda and water. Leave 10–15 minutes. Scrub gently with a non-abrasive cloth.
According to Family Handyman, mixing equal parts water and vinegar also works for laminate stains. Rinse thoroughly. Never use steel wool or abrasive scouring pads — they scratch the surface permanently.
Burn marks on laminate are not removable by cleaning. They require section replacement or a laminate repair paste for minor damage.
Butcher Block (Wood)
For light stains, dish soap and warm water are enough. For tougher marks, sprinkle table salt over the stain. Rub with a halved lemon in circular motions until the stain lifts. Rinse with clean water. Dry thoroughly — wood counters must not stay wet.
For dark stains that have set, a light sand with 120-grit sandpaper followed by mineral oil is effective. Sand along the grain only. Reapply food-grade mineral oil afterward.
Butcher block needs oiling every 1–3 months to resist staining. A dry surface absorbs stains rapidly.
Stainless Steel
Use dish soap, warm water, and a microfiber cloth. Always wipe in the direction of the grain. Against-the-grain wiping leaves visible scratches.
For stubborn spots, use a paste of cream of tartar and water. Avoid abrasive cleaners and steel wool. Both scratch the surface and remove the passive layer that protects against rust.
Do not use bleach on stainless steel. Bleach causes pitting and rust over repeated use.
| PRO TIP — The Stain Removal Method Most People Get Wrong: Baking soda is a mild abrasive. On stainless steel, it leaves fine scratches. Use cream of tartar instead — same lifting power, no scratching risk.For all porous stone surfaces, the poultice method works because it draws the stain out of the pores. Simply wiping the surface only removes what has not yet penetrated.Always test any new cleaner on a hidden section of the countertop first. Even stone-safe products can react differently on different finish types. |
Cleaning Frequency and Maintenance Schedule
Daily: Wipe down after cooking. Use a damp microfiber cloth with a drop of dish soap. Rinse and dry.
Weekly: Clean the full surface with a material-appropriate cleaner. Check for any fresh stains or discolouration.
Monthly: Deep clean. Check sealant on natural stone using the water-drop test — if water soaks in rather than beading, it is time to reseal.
Annually: Reseal granite and marble. Oil butcher block every 1–3 months. Reseal quartzite every 6–12 months.
What Not to Use — Material Damage Hazards
| Cleaner/Product | Surface at Risk | Damage Caused |
| Bleach | Stainless steel, granite sealant | Pitting, rust, sealant stripping |
| Vinegar / acidic cleaners | Marble, granite, quartzite | Etching, dull spots, permanent surface damage |
| Abrasive pads / steel wool | Quartz, laminate, stainless steel | Scratches, finish removal |
| Acetone | Laminate, quartz | Surface melting, discolouration |
| WD-40 near rubber seals | Undermount seal areas | Rubber degradation over time |
| Ammonia-based cleaners | Granite, marble | Sealant degradation, film residue |
| METHODOLOGY NOTE: Stain removal advice in this article applies to standard residential countertop finishes: polished and honed natural stone (granite, marble, quartzite), engineered quartz, plastic laminate (Formica-type), solid wood/butcher block, and brushed stainless steel.Methods for unsealed stone, antique finishes, or specialty coatings may differ. Always check your manufacturer’s care guide. Costs sourced from HomeAdvisor and Angi (March–April 2026). Regional pricing varies. |
Chemical Safety and Hazard Warnings
| ⚠ CHEMICAL SAFETY WARNING — MIXING HAZARDS: BLEACH + VINEGAR = Chlorine gas. Washington State Dept. of Health and the CDC confirm this reaction releases chlorine gas, which is toxic even at low concentrations.BLEACH + AMMONIA = Chloramine gas. Do not use ammonia-based glass cleaners after bleach-based disinfectants on the same surface.BLEACH + HYDROGEN PEROXIDE = Increased oxidising reaction. Do not combine.HYDROGEN PEROXIDE + VINEGAR (sequential on same surface) = Peracetic acid. Apply one, rinse completely, then the other if needed.DRAIN CLEANER (acid or alkali) + opposite pH product = Violent reaction. Never use drain cleaners on countertop surfaces.Source: Washington State Department of Health — Dangers of Mixing Bleach with Cleaners | CDC Cleaning and Disinfecting with Bleach guidance. |
| ⚠ MATERIAL DAMAGE — QUICK REFERENCE: Bleach on stainless steel: causes pitting and rust.Abrasive cleaners on natural stone: causes scratching and sealant removal.Vinegar on marble, granite, or quartzite: causes permanent etching and dulling.Acetone on laminate or quartz: causes surface melting.Always read the full product label before use. Work with ventilation open. |
Pro Tips and Common Mistakes
1. The most costly mistake: using the wrong cleaner on natural stone. One vinegar spray on marble creates etching that requires professional resurfacing costing $200–$700 (Angi, 2026). Always check the material before reaching for a cleaner.
2. Blot, do not wipe. On marble and porous surfaces, wiping spreads the spill deeper into the stone. Blot with a dry cloth first, then clean from the outside of the stain inward.
3. Rinse thoroughly after any cleaning product. Even stone-safe products leave residue if not rinsed. Residue builds up and attracts more dirt.
4. The water-drop sealant test: pour a tablespoon of water on a dry granite or marble surface. If it beads, the sealant is intact. If it soaks in within 5 minutes, reseal immediately.
5. For set-in oil stains on porous stone: cornstarch or talcum powder can help draw out fresh oil before you apply the baking soda poultice. Leave the powder for 1–2 hours, then sweep off and apply the poultice.
Common Problems and Solutions
| Problem | Symptoms/Signs | Likely Cause | DIY Fix | When to Call a Pro |
| Set-in oil stain on granite | Dark shadow on surface | Unsealed stone, spill not wiped promptly | Baking soda + water poultice 24–48 hrs | If stain remains after two treatments |
| Etching on marble | Dull, flat ring or mark | Acidic cleaner (vinegar, citrus) or spill | Light etching: marble polishing powder (Etch Remover) | Deep etching requires professional re-polishing |
| Bleach mark on stainless steel | Pitting, rust spot | Bleach or chloride cleaner contact | Light rust: Bar Keepers Friend paste, rinse well | Pitting damage is permanent — consult fabricator |
| White haze on quartz | Milky film on surface | Hard water deposits or soap residue build-up | Diluted isopropyl alcohol (50/50) on cloth, wipe and rinse | If haze returns quickly — may be seam or surface issue |
| Dark stain on butcher block | Brown/black spot, may be raised | Mould or set-in moisture from lack of oiling | Sand lightly along grain, apply food-grade mineral oil. Wear gloves. | If mould covers more than 5 sq ft — specialist required (EPA mould guideline) |
| Laminate burn mark | Brown/black discolouration, texture change | Hot pot or pan placed directly on surface | Minor: toothpaste or baking soda mild abrasive. Major: laminate patch kit. | Structural burn: section replacement needed |
Budget and Cost Breakdown
All costs are estimates. Sources: HomeAdvisor, Angi (March–April 2026). Regional pricing varies — verify locally before purchasing.
| Item / Service | DIY Cost | Professional Cost | Notes |
| Cleaning supplies (baking soda, dish soap, hydrogen peroxide) | $2–$15 | N/A | Widely available; sufficient for most stain types |
| Stone-safe cleaner (e.g. StoneTech, Method) | $10–$25 | N/A | Recommended for daily granite/marble care |
| Countertop sealant (stone) | $10–$40 per bottle | N/A | DIY annual resealing; one bottle covers average kitchen |
| Professional stone cleaning | — | $0.50–$1.50 per sq ft | HomeAdvisor, 2025 data |
| Professional resealing | — | $200–$700 per area | Angi, 2026 data |
| Stone restoration / polish | — | $200–$2,500 | Angi, 2026 — depends on area, stone type, damage severity |
| Countertop repair (chip, crack, stain) | — | $100–$1,200 | Angi cost guide, 2026 |
| Laminate repair kit | $8–$25 | — | For minor burns and scratches |
| TOTAL (DIY cleaning) | $20–$80 for full kit | — | Annual estimate for average kitchen |
Stain Removal Methods Compared
| Method | Approx. Cost | Best For | Effectiveness | Time | ⚠ Hazard/Note |
| Dish soap + warm water | $0 (household) | All surfaces, fresh spills | High for surface stains | 5 mins | None — safe on all materials |
| Baking soda paste | $1–$2 | Stone, quartz, laminate (light abrasion) | High for oil and set stains | 15 mins–48 hrs | Avoid on stainless steel (scratches) |
| Hydrogen peroxide (3%) | $2–$4 | Organic stains on stone and laminate | High for wine/coffee | Overnight | Do NOT mix with vinegar on same surface |
| Vinegar + water solution | $1 | Laminate and quartz ONLY | Medium for water spots | 10 mins | NEVER use on marble, granite, quartzite — etching |
| Commercial stone cleaner | $10–$25 | Natural stone daily maintenance | High | 5 mins | Check label — some contain acids; avoid on marble |
| Professional restoration | $200–$2,500 | Deep stains, etching, surface damage | Highest | Half–full day | Required for etching; not a DIY fix |
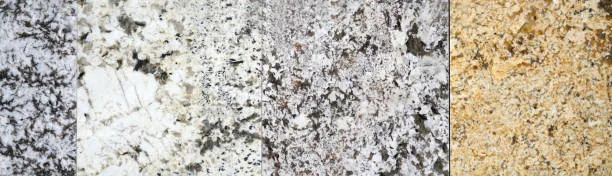
Image source: https://media.istockphoto.com/id/2155972345/photo/granite-floor-tile-samples-for-sale-in-store.jpg?s=612×612&w=0&k=20&c=NtDGR4tJmCanpWkdF1I5pz5c733if_jZxXrS0V_Zrvw=
Frequently Asked Questions
1. Why does my kitchen countertop keep staining even after I clean it?
Repeated staining usually means the sealant has worn away. Natural stone countertops need resealing every 12 months. Do the water-drop test: if water absorbs within a few minutes, the seal is gone. Reapply a stone-specific sealant and the problem should resolve.
2. Is it safe to use bleach on kitchen countertops?
Bleach diluted with water is safe for disinfecting non-porous surfaces like sealed laminate. However, bleach on stainless steel causes pitting and rust. On granite and marble, it strips the sealant. The CDC recommends good ventilation and gloves whenever using bleach indoors. Never mix bleach with vinegar, ammonia, or hydrogen peroxide — toxic gases result. Source: CDC, Cleaning and Disinfecting with Bleach.
3. How do I remove a red wine stain from marble?
Make a poultice from baking soda and hydrogen peroxide (3%) — thick paste consistency. Apply to the stain, cover with plastic wrap, tape the edges, and leave for 12–24 hours. Remove the paste, rinse with warm water, and dry. Do not use vinegar or lemon juice — they permanently etch marble.
4. How much does professional countertop stain removal cost?
Professional stone cleaning typically costs $0.50–$1.50 per square foot, according to HomeAdvisor (2025 data). Full restoration including polishing and resealing ranges from $200–$2,500 depending on the area size, stone type, and extent of damage (Angi, 2026). Costs vary regionally — get at least two local quotes.
5. Can I use vinegar to clean my granite countertop?
No. Vinegar is acidic and will degrade the granite sealant over time. On marble and quartzite, vinegar causes permanent etching. Use a pH-neutral, stone-safe cleaner instead. For everyday cleaning, a few drops of mild dish soap in warm water is the safest option.
6. What is the baking soda poultice method and does it work?
A poultice is a thick paste applied to a stain, covered, and left to draw the staining substance out of porous material as it dries. This Old House confirms the poultice method is effective for oil, wine, and coffee stains on natural stone. The paste must stay moist under plastic wrap while it works — this is why covering it is essential.
Browse our Kitchen Remodeling category covering professional installation standards, 2026 cost milestones, and expert-verified renovation blueprints.
Disclaimer: Advice in this article is based on published guidelines from industry authorities, manufacturer specifications, and Tier 1 sources as cited. Costs vary by region — all figures are estimates sourced at the dates stated and should be verified locally before purchasing. Safety information is sourced from recognised authorities but does not constitute professional trade advice.
For countertop surfaces with significant etching, structural damage, or persistent staining, consult a licensed stone restoration professional. This article is for informational purposes only. Always read product labels in full before use and work in a well-ventilated space.

4 Reasons To Choose A General Dentist For Your Household’s Care

What to Look for in Comprehensive Care for Long-Term Oral Wellness

Medical Uses of Ketamine Therapy in Modern Medicine

The Importance Of Transitional Care From Baby Teeth To Permanent Smiles

Otelia Cox: Inside the Private Life and Enduring Love Story of a Hollywood Cornerstone
-

 General2 months ago
What Is Felixing? The Truth Behind a Junk Keyword
-

 Health9 months ago
Lufanest: Effective Local Anesthesia with Fewer Risks
-

 Entertainment2 months ago
هنتاوي.com: Your Gateway to Arabic Anime Content
-

 General10 months ago
bardoek: The Artistic Heritage Inspiring Modern Creative Trends
-

 General9 months ago
Discover Anonib AZN: An Anonymous Asian Forum
-

 Fashion2 months ago
Fashionisk .com Explained: A Closer Look Before You Click
-

 Technology10 months ago
Aponeyrvsh: A Modern Framework for Innovation and Resource Use
-

 Lifestyle10 months ago
Mariano Iduba: A Visionary Leader in Global Digital Growth